Why You Should Deadlift

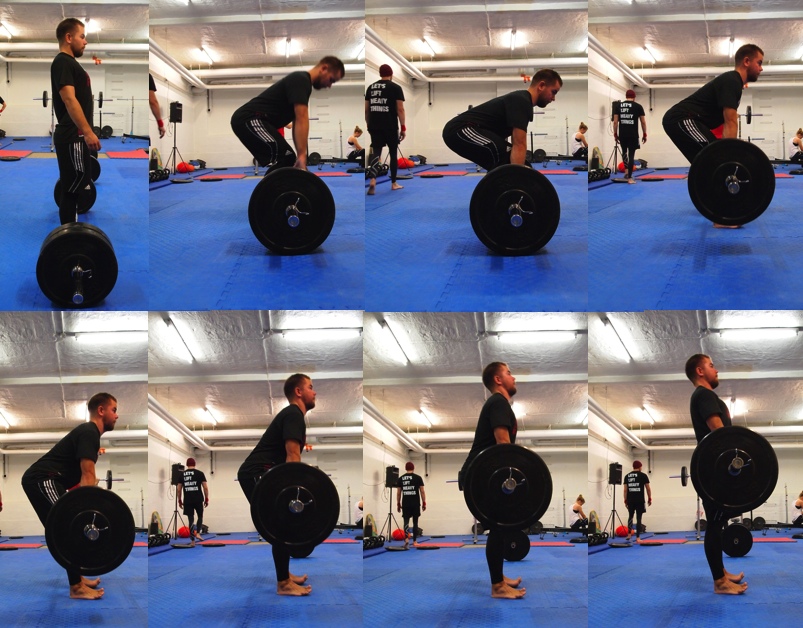
Aside from the traditional barbell back squat, no other exercise works the entire body like the conventional deadlift. In fact, some would argue that the deadlift offers more benefits than the back squat. Both exercises are functional in nature and engage nearly the same muscle groups. However the deadlift, which is a a hip dominant exercise, additionally recruits fibers of the upper body musculature and as a result burns more calories. The lower and upper back, anterior core and forearms are greatly engaged. The prolonged gripping of the barbell also helps to improve grip strength. I’ve always maintained that if I only had to do one exercise for the rest of my life, it’ll be this one.

Apr27-2013DanielGym-043-ed1

Contrary to popular belief and societal misconceptions, everyone CAN and SHOULD deadlift. It is not a ‘guy’s exercise’. Although different versions like the Sumo Deadlift, Romanian Deadlift and Suitcase Deadlift exists, the traditional version yields the most dividends and should be prioritized in everyone’s training programs. The deadlift addresses virtually every health and fitness goal from fat loss and lean muscle gain to strength, power, core stability and even postural enhancement.

Here are 5 reasons why you should deadlift:

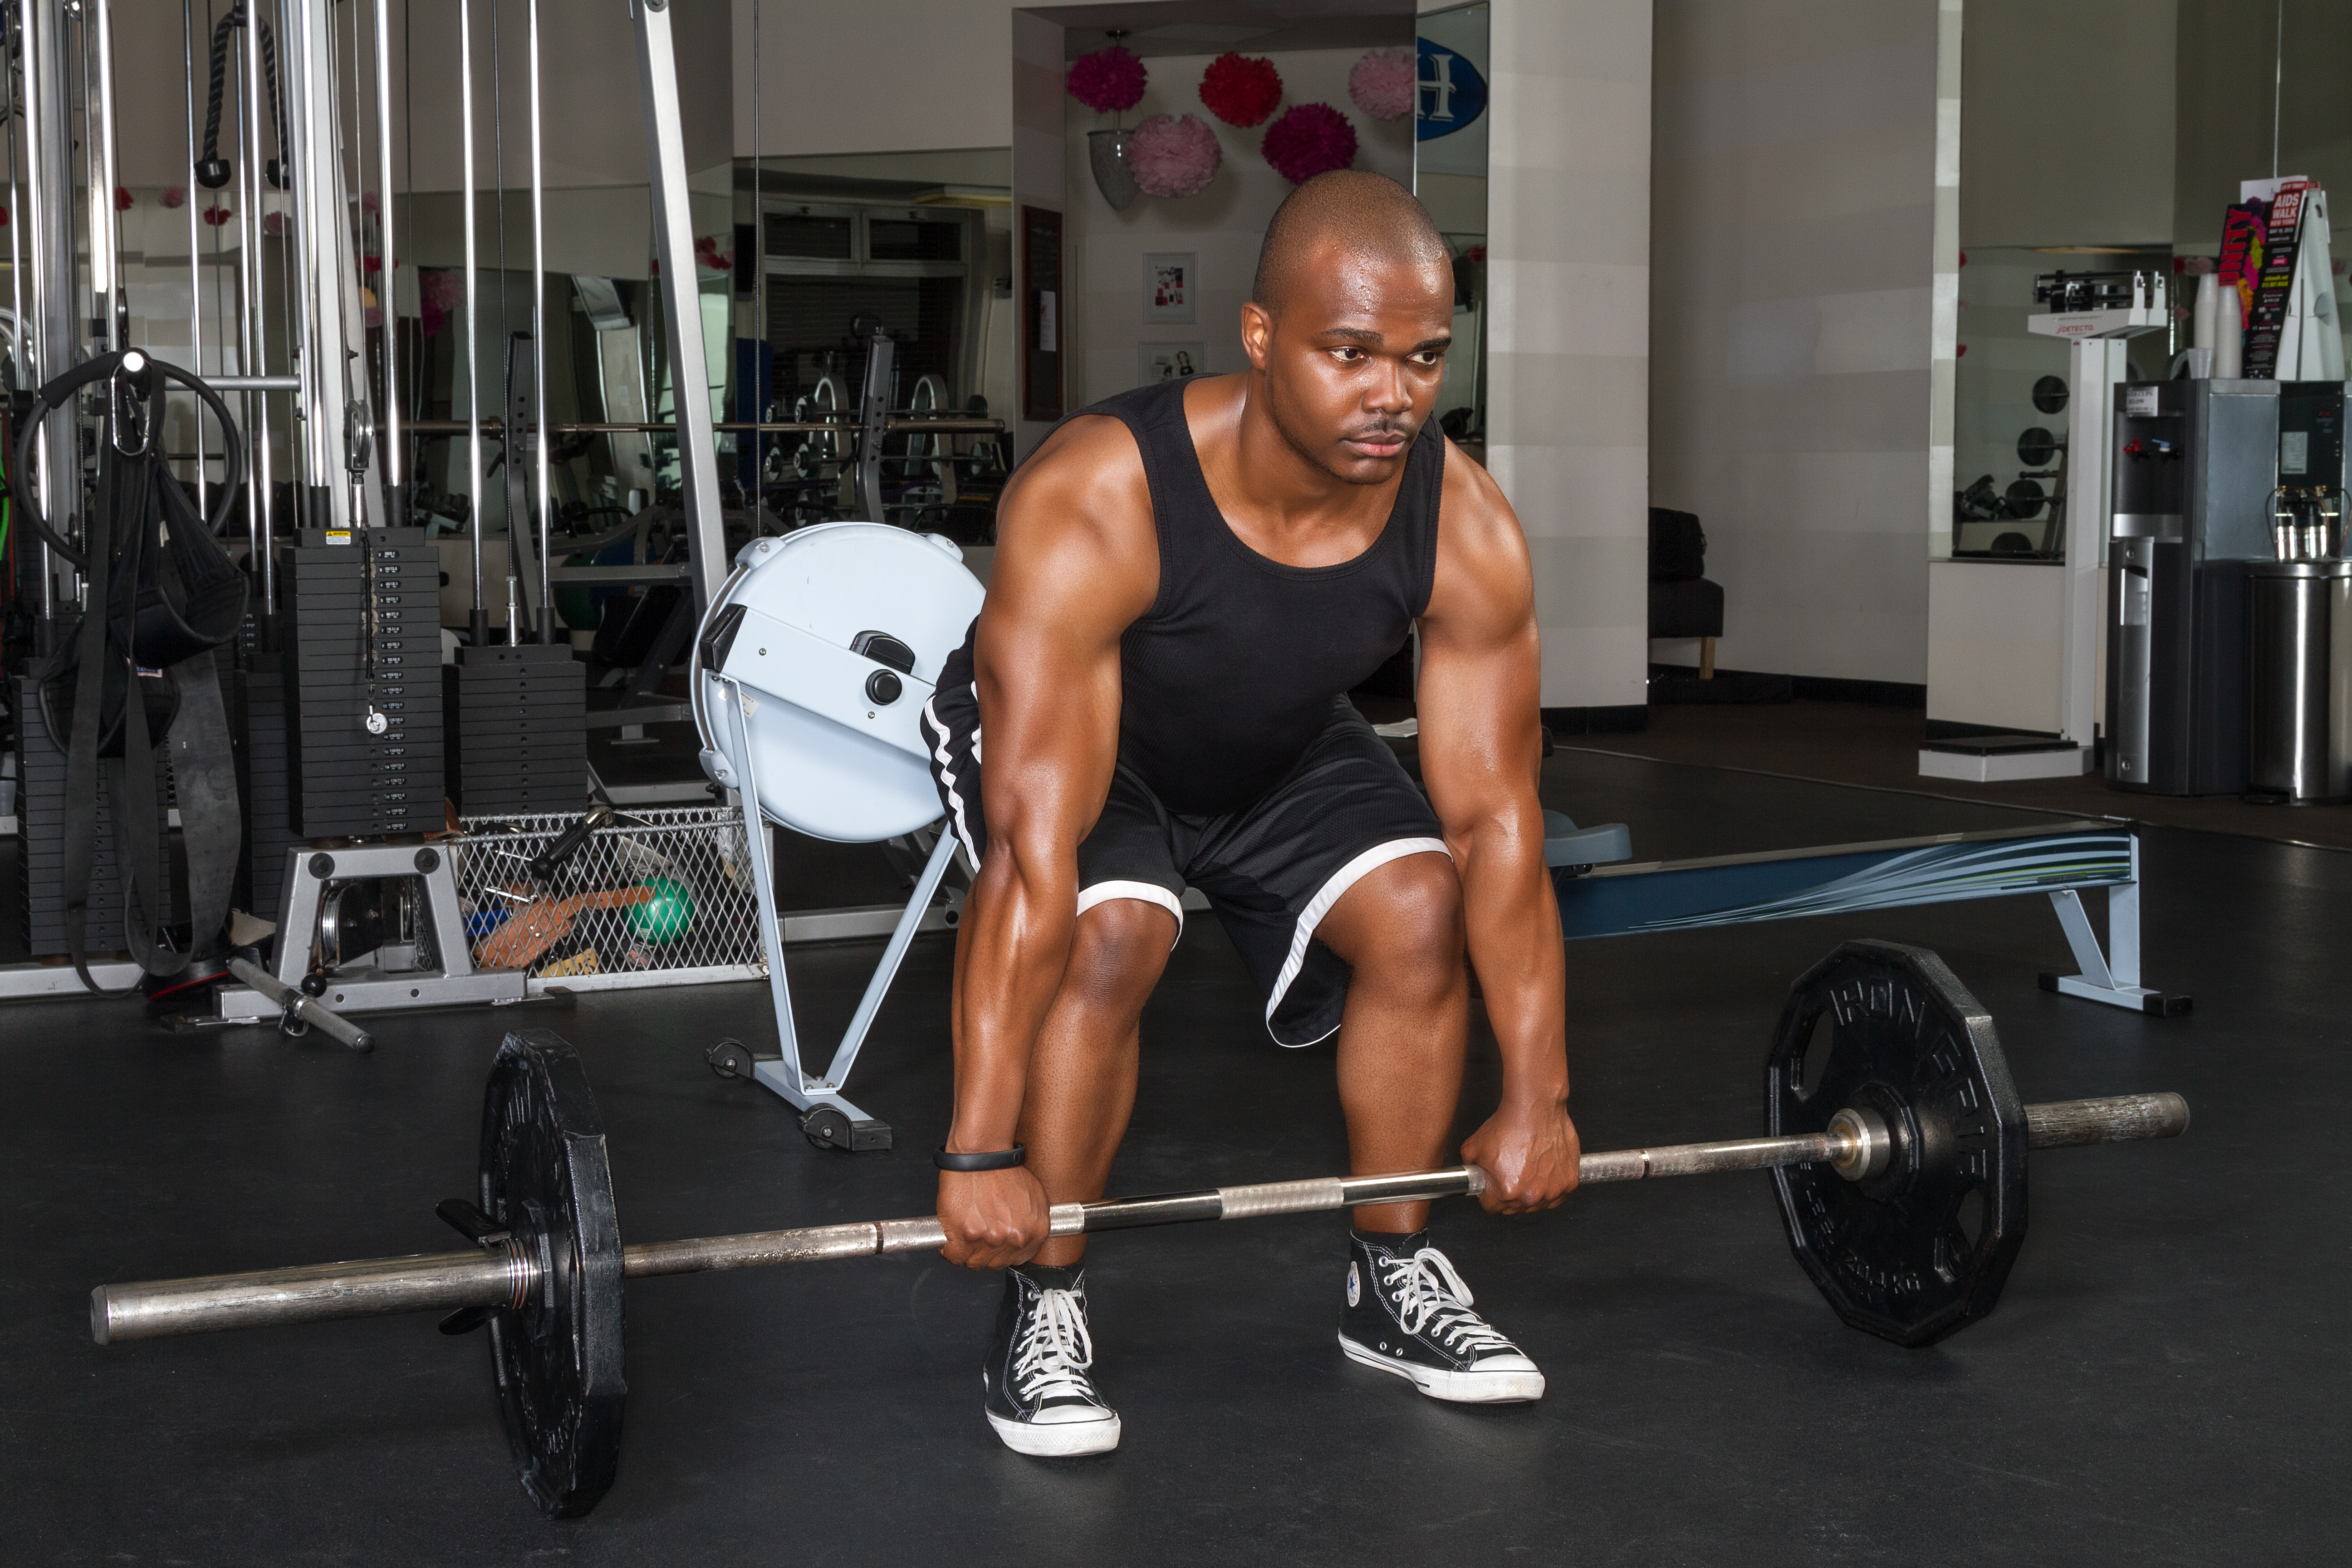
1. Functional Component: If you had to pick up a box or bin from the floor, you would without a doubt hinge your trunk slightly forward, push your hips back, reach down with you arms and then drive back up with the box using your heels. That’s a deadlift in a nutshell! We pick things up from the floor everyday and the deadlift is perhaps the only exercise that mimics that action. By deadlifting regularly, the body continually adapts to picking up dead weighted objects from the floor. This can become extremely helpful in the event a much heavier box had to be picked up.

2. Full Body Work: The deadlift is one of the few exercises that requires lifting a dead weight from the floor. It is a true integration of the upper and lower body musculature due to the simple fact that the entire kinetic chain has to work in synergy in order for any object be picked up from the floor. When executed properly, the quadriceps and dorsiflexors activate themselves at the starting phase and contract to about the middle of the rep. From that point, the forearms, hamstrings, glutes, lower and upper back take over. Although you won’t feel a ‘burn’ in your abs, believe me when I say your core will activate via resisting anti-flexion during the eccentric (lowering) phase

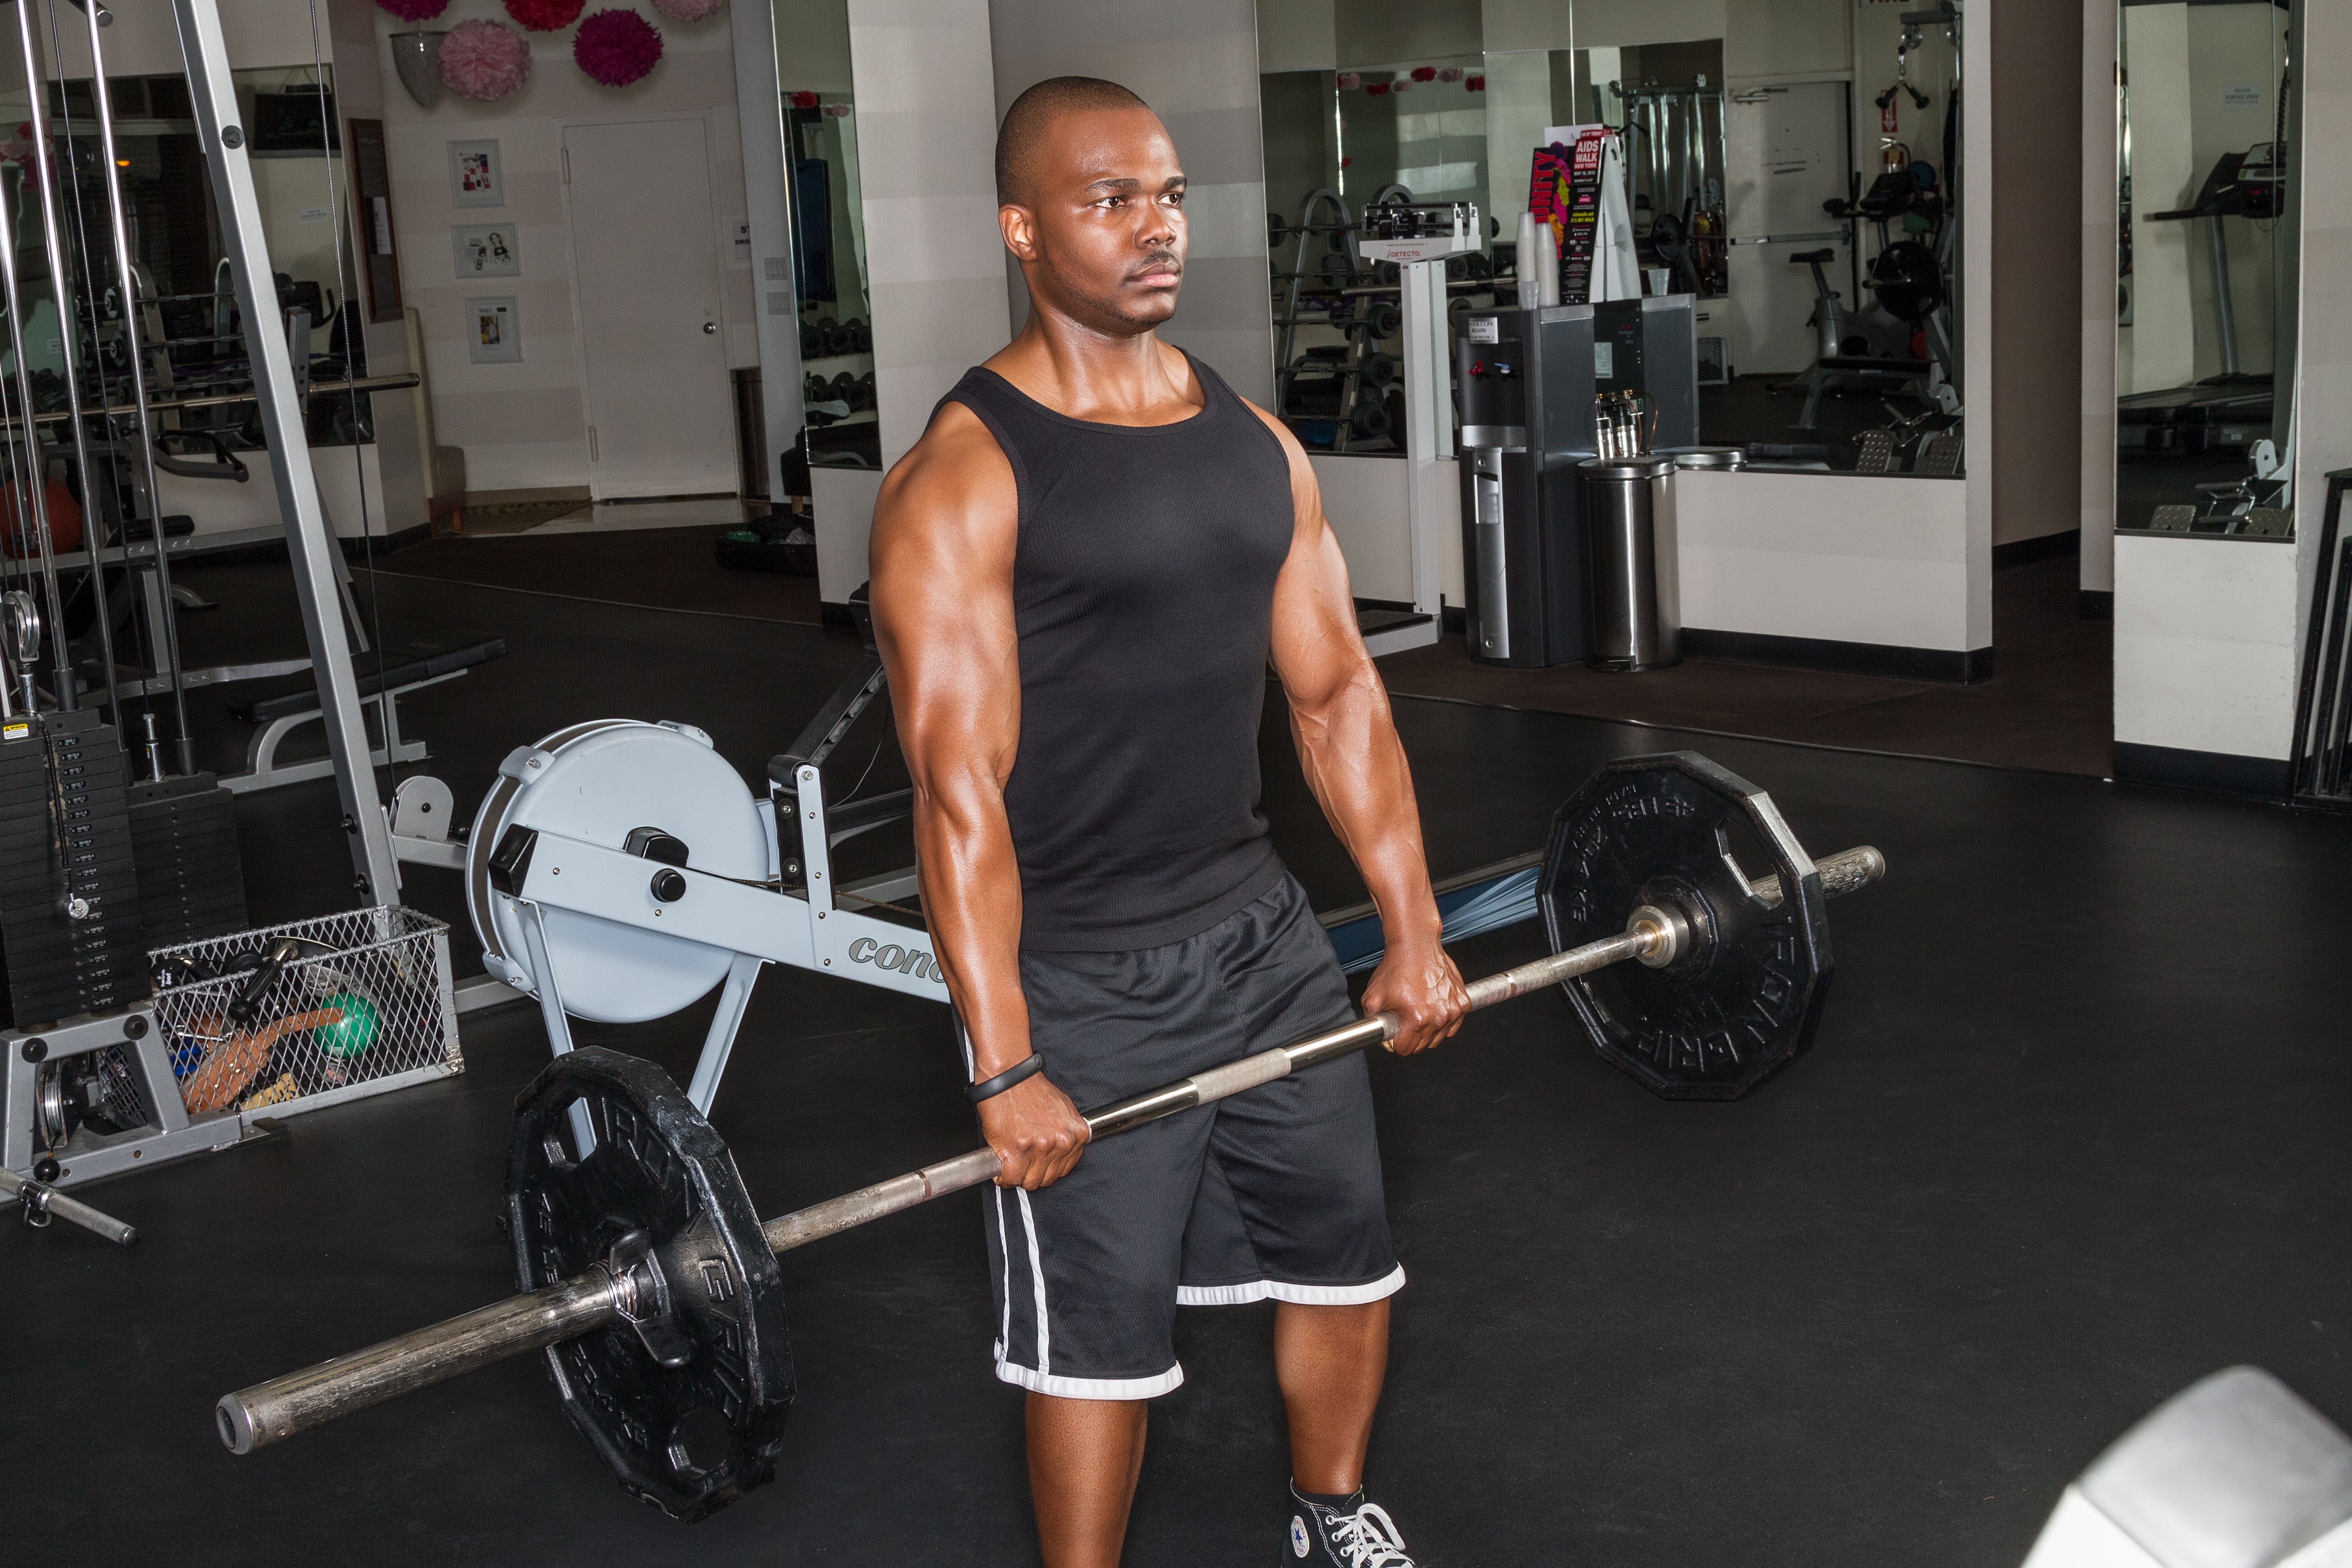
3. Postural Impact: Complete execution of the deadlift requires a lockout at the top of the movement. This means the shoulder blades must retract and hips must fully thrust. Both movements are essential for correcting short hip flexors and tight shoulder internal rotators. The extension of the hips at the top of the deadlift forces the opposing iliopsoas muscle group to get a stretch and lengthen. Simply put, contraction of the hip extensors will correct short hip flexors. At the top of the movement, retraction of the shoulder blades forces an internally rotated shoulder to externally rotate. When performed routinely, this will have a tremendous impact on a person’s posture. Even the dorsiflexors, which activate during the start phase, helps improve ankle mobility by stretching the calf muscles.

Apr27-2013DanielGym-037-ed1

4. Best Upper Back Builder: When it comes to overall development of the upper back, no exercise works better than the deadlift. Traditional back exercises like the pull-up and bent-over row are fantastic choices for adding mass to the back but they pale in comparison to the thickness and density the deadlift provides. Part of the reason for that is because of the constant tension in the posterior trunk muscles during it’s execution. So many exercises can be used to work the back in an exercise program but the deadlift is the king.

5. Power & Strength: Of the 3 primary powerlifting movements, the deadlift has the potential for developing maximal power and strength because it uses the entire body. The bench press and squat can do the same but are affected by shoulder and knee limitations via max load. The shoulder girdle complex can only handle so much weight from bench pressing. Almost every guy I know that regularly bench presses heavy has some kind of shoulder pain. The shoulder is one of two joints impacted during a bench press (the other being the elbow), therefore too much tension on it makes it susceptible to injury. And although the deadlift and squat use similar joints (knee, hip, ankle and lumbosacral joints), the compressive forces on the knee and back in a traditional back squat makes the potential for maximal strength and power minimal compared to a traditional deadlift.

5 exercises that can help improve posture

For many fitness enthusiasts who train regularly, posture and body mechanics are two vital areas of concern. We often hear people say to others, “Sit up straight”, “Pull your shoulders back” or “Keep your spine tall”. The term ‘slouch’ has never been more apparent in our society the way it is today. Thanks in large part to several case studies that have linked poor posture to imbalances in the kinetic chain, back pain and other degenerative diseases like scoliosis and kyphosis.

Those who know me well will tell you that I’m a strong advocate of postural awareness. Before I take on any new client, I put them through a series of movement pattern screening and postural evaluation exercises. So many different exercises can be used to assess and evaluate posture. In my humble and professional estimation there isn’t a best one, although some fitness professionals could make a case for the Overhead Squat.

There is currently insufficient evidence that supports the notion that exercise can correct posture or lead to deviations. More research is still being conducted at this time. While I don’t believe postural training exists, there are few exercises that can help improve and enhance poor posture. It is important to remember that these exercises shouldn’t be relied entirely upon for postural correction. Active stretching, myofascial work and mind-body awareness should be integrated as well.

So without further ado, here are my top 5 exercises for improving posture:

1. DEADLIFT: I’ve written extensively about the Deadlift in some of my previous blogs. This is arguably the best resistance exercise for improving posture because of it’s functional component. No other exercise mimics the action of picking up an object from the floor. But even more important are the mechanical aspects of it. Setting up for this exercise requires the trunk to be in a diagonal alignment from shoulder to hip which reinforces neutral spine. Flexion of the hips automatically causes activation of the dorsiflexors of the leg forcing the ankle to be mobile. The retraction of the shoulder blades and full extension of this hips  via thrusting at the completion of the movement emphasizes good posture. Retraction and adduction of the scapula will help a person who is internally rotated in the shoulders via external rotation. Likewise, extension of the hips will help a person who has  tight hip flexors and over-lengthened glutes due to prolonged sitting by stretching them at the top of the movement.It is important that you don’t hyperextend the lumbar spine like some people do.

Deadlift1

2. REVERSE LUNGE: The most knee-friendly lunge variation is also a good exercise for those with short and tight hip flexors. When dumbbells are used, the shoulder girdle and upper back region get activated. The hip flexors of the leg that lunges backwards get a deep stretch during execution of this exercise. When I perform this movement, I try to hold the bottom position for 2 seconds to illicit a good dynamic stretch of the hip flexors. When dumbbells are held in each hand, the shoulders ‘pack’ and forced to pull themselves back due the challenge of maintaining good balance. A much farther center of gravity forces the shoulders to externally rotate to prevent tilting forward because of the additional resistance in each hand.

3. SCAPULAR WALL SLIDE: This is an exercise that will garner weird looks from others when you’re doing it. If only those people knew the amazing postural impact it has on the trunk musculature. The good thing about this movement is that it can be included as part of your pre-workout mobility warm-ups or as an exercise in a resistance training program. Stand with your head, upper back and butt against a wall. The heels of your foot should be anywhere from 12 to 18 inches away from the wall. Lift your elbows to shoulder level and press your forearms back against the wall so your elbow and shoulder make a 90-degree angle. Most people won’t be able to get their forearms to press firmly against the wall indicating tight shoulder internal rotators and chronic slouchy posture. With your head, upper back and butt pressed against the wall, fully extend the elbows in a diagonal pattern, hold for a second and return to your starting point. Many will also have a hard time keeping their back flat and will arch quite often early on. The objective here is to continue to keep the forearms close to the wall as much as possible and do your best to keep the back flat. I used this movement to correct extremely tight shoulder internal rotators I battled with for many years. My forearms were 10 inches from the wall when I started this movement!  Though they’re not quite touching yet, they’re about 4 inches from the wall today.

4. DUMBBELL SUITCASE DEADLIFT: This deadlift variation, which was developed through the real life action of picking up a suitcase, is ideal for training the core stabilizers while also strengthening the posterior chain. Though identical to the conventional deadlift, it is different in it’s unique way. Hold a dumbbell of moderate resistance in one hand and stand in front of a mirror in neutral alignment. Your stance should be 3-5 inches less than hip-width apart. Push your hips back and bend the knees as you would do in a regular deadlift. Lower the dumbbell as far as your can without rounding your back or letting your knees cave in. The objective here is trying to remain symmetrical despite the destabilizing forces from the dumbbell attempting to pull you out of alignment. The reason for the mirror is to keep an eye on your symmetry and alignment ensuring you remain neutral all along. Do not allow your trunk to tilt laterally while performing this movement. It is the resistance to tilting that yields the benefits of this exercise. As an added bonus, the core musculature is activated via anti-lateral flexion exercises.

5. WAITER’S WALK: Popularized by the innovative Gray Cook, this exercise is eerily similar to the suitcase deadlift due to the asymmetrical nature of both. The idea behind this exercise came to fruition after witnessing the incredible dexterity and skill waiters display as they constantly hold and walk around with a tray in one hand above their head. To perform this exercise, hold a dumbbell of moderate resistance in an overhead stance. Earlier I talked about ‘packing’ of the shoulder girdle for increased joint rigidity. The same technique applies in the Waiter’s walk. With the dumbbell over your head, ‘pack’ and pull your shoulder back into the scapular without shrugging. Keep your upper arm as parallel as you can next to your ear. As you begin to walk, you’ll feel the weight of the dumbbell trying to pull you out of alignment from all directions. The challenge is to resist these forces and remain symmetrical as much as you can. Do your best to avoid tilting and hiking up the hips. When all the mechanics fall in place, the result is an erect posture in neutral alignment. Begin by walking 20 to 30 yards per arm and work your way up to 40 to 50 yards.

So there you have it. 5 exercises that can help improve your posture. Keep in mind that these are based on my personal experience and years of extensive theoretical studies and research. As always, use good form and work with a moderately challenging resistance. Incorporating active stretches and self-myofascial release will make the process much easier.

The correlation between the hip flexors and back pain

It is estimated that 8 out of 10 people living in this country will at some point experience some sort of back pain. That’s an alarming 80 percent of the country! Poor posture, mechanical imbalances and lack of physical activity are the major prevalent reasons behind this epidemic. Although a recent UN study now ranks Mexico as the most obese country in the world, America is still a close second with a 31.8 percent adult obesity rate. Obesity has been linked to knee, hip and ankle pain, all of which have a direct impact on the lumbar spine.

While back pain can result from a number of factors, perhaps the most common cause of it is weak and tight hip flexors.

The hip flexors are a group of muscles that enable to thigh bone to flex or allow the knee to bend towards the trunk. Activities like stair climbing, squats, lunges and sprinting all require engagement of these muscles. Collectively referred to as iliopsoas, they consist of two major muscles, the psoas major and the iliacus. The psoas major originates form the lumbar spine area and attaches in upper region of the upper thigh hip bone. The psoas is the primary hip flexor. The iliacus originates and attaches in front of the upper thigh hip bone.

Hip Flexors 2

In my experience, almost everyone has some sort of issues with their hip flexors. I’m yet to find a person with super pliable and strong hip flexors. Many of us have tight and weak hip flexors and don’t even know it until it chronically gets bad and starts to affect the low back. Prolonged sitting, not enough emphasis on glute training and excess abdominal crunching are 3 of the major causes for tight hip flexors.

When we stay in a seated position for a very long time, the psoas shortens and pulls on the lower back. Imagine the psoas as an elastic band. When the body is standing in a neutral position, the band is fully stretched in its highest elasticity. But when the body sits, the elasticity of the band gets slack and the length is reduced as a result. When the psoas stays in this slacked position for a long time, it causes the pelvis to tilt anteriorly causing arching of the low back and overstretches and lengthens the glutes.

When the butt gets too slack due to overstretching from prolonged sitting, it automatically gets weak requiring the need for more glute training. Certain abdominal crunches like the prone jackknife where there is repeated hip flexion has also been known to tighten the hip flexors. This is the reason why some us feel a an uncomfortable burning sensation in our upper thigh area while performing these exercises. This ultimately leads to low back pain due to excess stress on the psoas.

The good news is that there are ways to loosen the hip flexors and permanently prevent back pain. Activation mobility drills, self myofascial release work, strength exercises and dynamic stretches are the remedy.

1. WALL MARCHING (PSOAS ACTIVATION): This is a great drill for anyone who sits at a desk for the majority of the day. Stand in front of a wall at arms length with a neutral spine. Place both hands on the wall so you’re in a vertical push-up stance. From there, lift one knee to about hip height or slightly higher. Your pelvis should tilt posteriorly as your upper back rounds slightly. Don’t worry about that. Just make sure it doesn’t round excessively. Hold that position for about 5 seconds and switch to the other knee. Aim to do 8 to 12 repetitions per side.

2. SELF-MYOFASCIAL RELEASE: This is the most uncomfortable of all the hip flexor drills because of it’s direct contact on the fascia. However SMR is the one of the most effective ways of loosening tight muscles and restoring blood flow. A foam roller or small hard ball is needed for this, though using a lacrosse or tennis ball will work much better. Place the foam roller or ball directly under the hip flexor muscles on the floor and roll around it for a couple of minutes. To intensify this, locate a tight spot and stay on it for 20 to 30 seconds. After about a couple of minutes of doing this, you should feel some warmth in your upper thigh region indication increased pliability and restoration of blood flow.

3. STRENGTH EXERCISES: The reverse lunge and hip thrust are two great exercises for fixing tight hip flexors. As mentioned earlier, the glutes weaken and stretch as a result of shortening of the hip flexors. These two exercises serve to activate the glutes while stretching the hip flexors simultaneously. In a reverse lunge, the hip flexors of the back leg is relaxed and stretched while the butt activates. The same theory applies in a hip thrust where the hip flexors get a deep stretch at the top of the thrust while the opposing glute muscle gets contracted.

4. DYNAMIC STRETCHES: Many hip flexor stretches exist for loosening of the psoas and iliacus. Most of them are effective and will certainly help the cause if done correctly and held for a good amount of time. However one of my favorite and perhaps the most common is the half-kneeling stance hip flexor stretch. From a half kneeling stance, drive the butt of the knee on the ground forward until you feel a mild stretch in your hip flexors. It is imperative to drive from the glutes and NOT the lower back. The spine should be neutral all along and arching of the lower back must be prevented. Hold this for about 30 seconds and repeat on your other leg.

These movements and exercises must be performed routinely for results to occur. Make sure you incorporate them in your workout sessions and work and keep the intensity mild. As always listen to your body and consult with a fitness professional if you need any help.